Hi friends!
Wow! This went by so fast! I’m here to share with you the LAST post of my calendar series! To be absolutely honest, I was very burnt out by the end of the series which is why I haven’t made one for 2015, but I really want to do another calendar series. We’ll see… 😉
I had the idea for this one for a while before December 🙂
The Basics
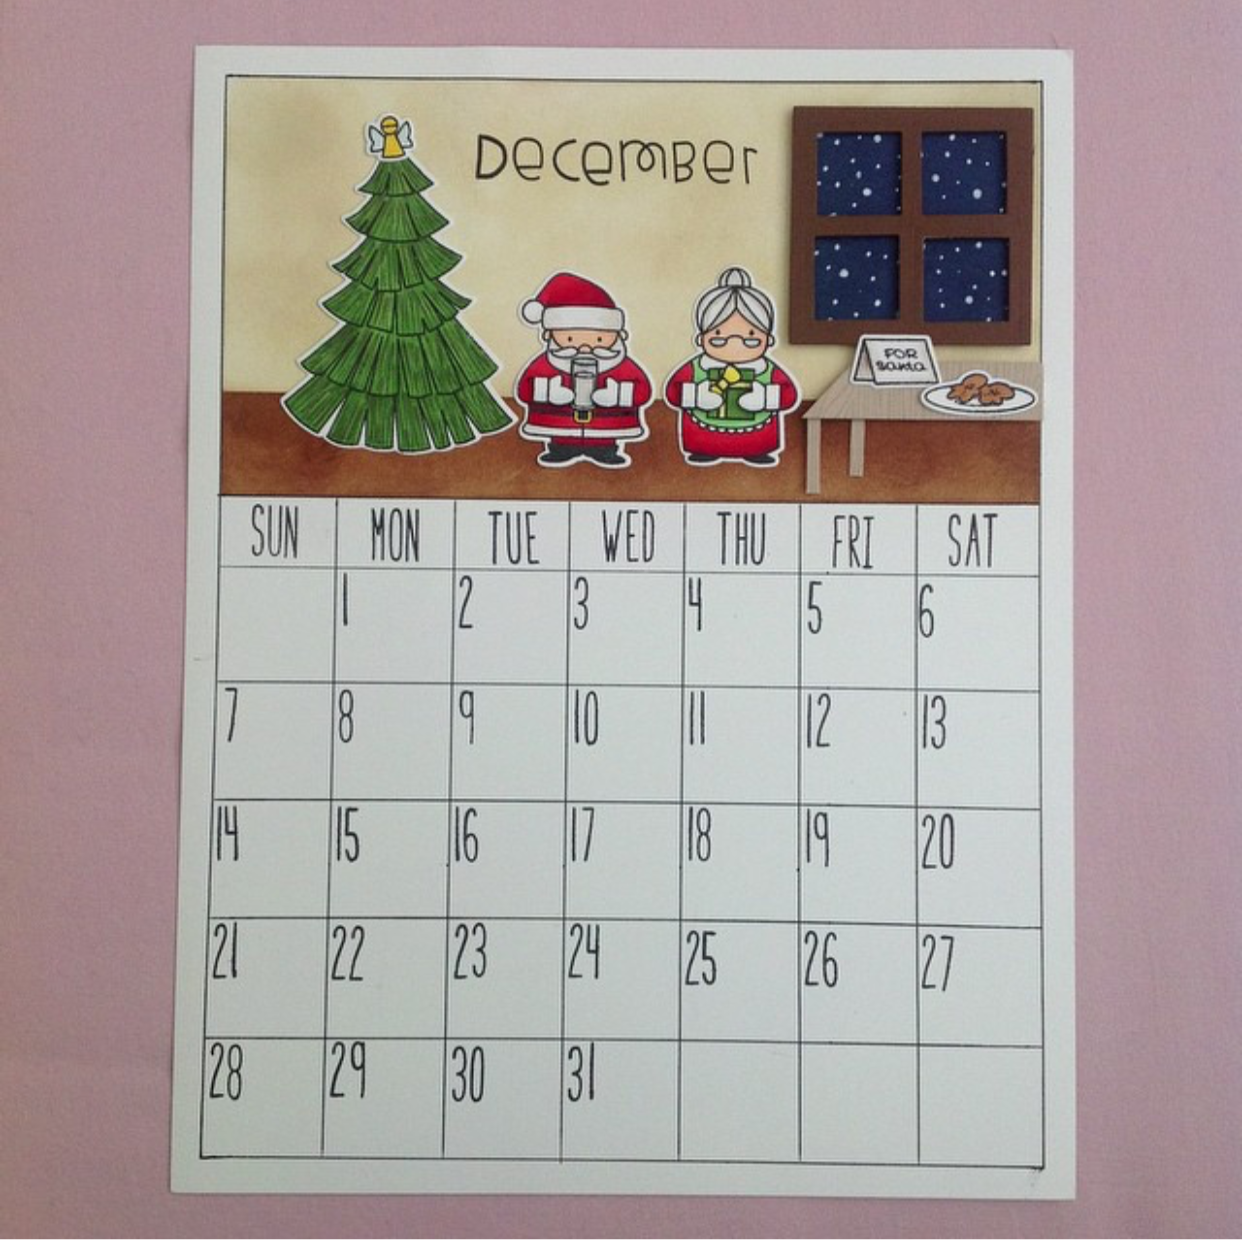
• To begin, I used my T-square ruler to draw all the lines with whatever black pen I had (more often than not it was with a Sharpie fine point pen, black Pilot pens, or Sakura Micron pens) and stamped the days of the week and dates using Lawn Fawn’s Milo’s ABC’s. Now, on to the fun part~
• I began by masking off the top panel (leaving out about an inch or an inch and a quarter or so off the bottom) and distressing it using Antique Linen distress ink. I distressed the bottom part using Gathered Twigs.
• I stamped and die cut Santa Claus, Mrs. Claus, Christmas tree, topper, glass of milk, present, note for Santa, and plate of cookies using Tuxedo Memento Black ink. I set everything aside and focused first on my people 🙂
Santa Claus & Mrs. Claus
• I colored Santa and Mrs. Claus using R35, R29, and R59. Warm grays (W1, W3, and 0 – the colorless blender, my then new favorite) were used to color in Santa’s beard, Mrs. Claus’ cute bun and collar, and their mittens. Their skin was colored using E00 and E11.
• I used Y08 for Santa’s belt buckle. I went out of the lines a couple of times with Santa, so I covered it up using the Signo Broad white gel pen. Those darn Copic reds bleed so easily! 😠
• I colored Mrs. Claus’ apron using YG07. I didn’t bother to shade it because most of it was going to be covered by the present. 🎁 I also colored in her glasses with B0000 and coated it with Wink of Stella before topping it off with some Glossy Accents.
• I stamped four extra mittens and fussy cut them after coloring them the same way with warm grays.
The 🎄 & Topper
• I feathered in streaks of YG85 before coloring the whole Christmas tree using YG63.
• I used YG08 and B0000 on the topper before making it shiny and pretty using the Wink of Stella.
The Table, Note, and Cookies
• I wanted a woodgrain texture to the table, but my embossing folder and Lawn Fawn’s Woodgrain Backdrops were too large for my small table. I dug out one of my Hero Arts wood mounted background rubber stamps. I stamped it using Versamark ink which just leaves a watermark or a tone on tone look. I cut all the pieces using my paper trimmer for a guaranteed straight edge. 🙂
• I used W1, W3, and W5 to add dimension to the note. 🙂
• I colored the cookies using E35. I think I forgot to color the plate. I may just go in now and add some warm grays to it. 😁
The Window, Glass of Milk, and Present
• I die cut one brown square and one white square using the Square Spellbinders Nestabilities. I cut four squares out of the brown frame using the smallest square to create the window. I then trimmed off a little bit off of the white piece to make it easier to hide behind the frame later. I distressed it using Chipped Sapphire and added my snow using the Signo Broad white gel pen. I adhered the frame down by cutting the skinniest pieces of foam tape.
• For the glass of milk, I colored the glass part with B0000, covered it in Wink of Stella and Glossy Accents, and fussy cut it.
• The present was colored using YG09, and the ribbon was colored using Y08 and Y19.
Assembly
• I first adhered down the Christmas tree, the topper, Santa, Mrs. Clause, and the window flush against the calendar.
• I used foam tape to pop up the tabletop and “front” leg. I then tucked the “back” leg using my Zig glue pen and EK Success tweezers (my lifesaver!) I then added the note to Santa and plate of cookies to the table.
• Once I had all my images situated, I stamped “December” using Versafine Onyx Black pigment ink and Paper Smooches’ Alphadot.
• I gave Santa and Mrs. Clause their things to hold and then popped up the extra gloves using foam tape.
And this is how it ends! 👏🏼👏🏼👏🏼 Yay! Hopefully I will continue to have a lot to share (and actually get around to sharing) with you on my blog!
Thanks for stopping by!
Sharon 💕
                       |


